| Material | Best for | Typical effort | Keep in mind |
|---|---|---|---|
| Cardstock | Garlands, bats, ghosts, window shapes | Low | Folds cleanly and stores flat |
| Corrugated cardboard | Haunted houses, tombstones, large props | Medium | Strong, but exposed edges can look rough |
| Tissue paper | Lantern shades and layered ghosts | Low | Delicate; keep away from flames |
| Paper bags | Luminaries and treat holders | Low | Use battery lights only |
| Recycled cereal boxes | Small stand-up figures and ornaments | Low | Lightweight and easy to cut |
A stack of cardstock, a shipping box, and a pair of scissors can do more for Halloween than another plastic bin of decorations. These DIY Halloween decorations are made from paper and cardboard, so they’re inexpensive to customize, easy to store flat, and friendly to small spaces. The trick is choosing projects that suit the time you have: a five-minute bat garland is a different commitment from a layered haunted-house display.
Below are 21 ideas for windows, walls, tables, and porches, with practical notes on materials, difficulty, and time. Most use supplies you may already have. For anything that will sit near a flame or outdoors, use battery lights and protect paper from moisture.
Start with a simple paper-and-cardboard toolkit
Before you cut, decide where the decoration will live. A window silhouette needs clean edges and a dark shape that reads from a distance. A tabletop centerpiece can have more detail because guests will see it up close. For a porch display, sturdy corrugated cardboard works better than thin construction paper, but it still needs shelter from rain.
Gather a few basics: black, orange, and white cardstock; recycled corrugated boxes; scissors; a pencil; a ruler; glue stick; painter’s tape; and string. A craft knife can help with window openings and small details, but it belongs with an adult. Keep the work surface clear and use a cutting mat or scrap cardboard underneath.
For a cohesive look, limit the palette to three or four colors. I like black, warm white, and pumpkin orange with one metallic accent; too many colors can make a small display feel busy. If you’re decorating a rental, use removable painter’s tape on a test spot first, especially on painted walls. On glass, small pieces of removable tape are usually easier to take down than strong adhesive.


21 DIY Halloween decorations to make from paper and cardboard
These projects range from quick cutouts to small builds. Times are estimates for one person working at a relaxed pace; intricate cutting or helping kids will add time. For a fast room refresh, combine one large focal piece with a few small accents instead of making all 21.
- Folded paper pumpkins — Accordion-fold orange cardstock strips, fan them into a circle, and add a green paper stem. Materials: cardstock and glue. Cost: about $1–$3 per pumpkin using craft supplies. Difficulty: easy. Time: 15–25 minutes.
- Black paper bats — Fold black cardstock in half, draw half a bat, cut, and unfold for symmetry. Tape a few to a wall or window in a rising flight pattern. Cost: under $2. Difficulty: easy. Time: 10–20 minutes for a group.
- Ghost garland — Cut simple ghost shapes from white cardstock, draw faces with a plain black marker, and string them with thread. Cost: $2–$4. Difficulty: easy. Time: 20–30 minutes.
- Cardboard haunted house — Cut a house silhouette from a flattened box, then add windows and a crooked roofline. Paint or cover it with black paper. Cost: $0–$5. Difficulty: medium. Time: 45–75 minutes.
- Paper-chain pumpkins — Make orange paper loops into a chain and add a green leaf at each end. It’s a good low-mess project for kids who can safely use scissors. Cost: $1–$3. Difficulty: easy. Time: 20 minutes.
- Layered window silhouettes — Cut a moon, bare branches, and a few cats or bats from black cardstock. Arrange them on the inside of a window so the shapes show clearly from outside. Cost: $2–$5. Difficulty: easy to medium. Time: 30–45 minutes.
- Cardboard tombstones — Cut rounded or angled shapes from a box, paint them gray, and add cracks with darker paint. Keep them indoors or under a covered porch. Cost: $0–$6. Difficulty: medium. Time: 30–60 minutes.
- Paper rosettes — Fold black and orange paper accordion-style, join the ends, and flatten into a fan. Hang a few at different heights for a graphic wall display. Cost: $2–$5. Difficulty: easy. Time: 15–25 minutes each.
- Mini paper witch hats — Roll black cardstock into cones, trim the base, and add a circular brim. Use them as place-card accents or scatter them across a mantel. Cost: $1–$3. Difficulty: easy. Time: 10–15 minutes each.
- Cardboard coffin treat box — Cut a coffin-shaped base and matching lid from thin cardboard, then tape the sides into a shallow box. Cover with black paper. Cost: $0–$4. Difficulty: medium. Time: 30–45 minutes.
- Paper spiderwebs — Fold a square sheet into a triangle, make evenly spaced cuts along the folded edge, and unfold carefully. Thin paper cuts more easily than heavy cardstock. Cost: under $2. Difficulty: easy. Time: 10–15 minutes.
- Standing cardboard cats — Cut two matching cat profiles and slot them together with a small slit at the base. Paint them black or leave the cardboard natural for a softer look. Cost: $0–$3. Difficulty: medium. Time: 25–40 minutes.
- Paper-bag luminaries — Cut simple shapes into plain paper bags, add a little sand for stability, and place battery tea lights inside. Never use real candles in paper. Cost: $3–$8. Difficulty: easy. Time: 15–25 minutes.
- Cardboard moon phase garland — Cut circles from black and cream cardstock, layer them to suggest moon phases, and string them across a doorway. Cost: $2–$4. Difficulty: easy. Time: 20–30 minutes.
- Accordion-fold paper ghosts — Fold white paper into a fan, pinch the middle, and add a small face. Hang several from a branch or ceiling hook. Cost: $1–$3. Difficulty: easy. Time: 10–20 minutes.
- Recycled-box monster faces — Cut eye, mouth, and horn shapes from cereal-box cardboard, then layer them into playful wall masks. Cost: $0–$3. Difficulty: easy. Time: 20–35 minutes.
- Cardboard fireplace silhouette — Cut a simple black fireplace shape from a large box and add orange and yellow paper flames. It makes a fun backdrop for a mantel or party table. Cost: $0–$6. Difficulty: medium. Time: 45–60 minutes.
- Paper cone trees — Roll black or dark green cardstock into cones, trim the bottoms flat, and add tiny paper stars or moons. Group three sizes together. Cost: $2–$5. Difficulty: easy. Time: 15–25 minutes each.
- Cardboard haunted village — Cut several house fronts from box panels, vary the rooflines, and stand them in a row. Add battery lights behind the openings for a warm nighttime effect. Cost: $0–$8. Difficulty: medium. Time: 60–90 minutes.
- Paper plate jack-o’-lanterns — Paint or color paper plates orange, cut simple eyes and mouths from black paper, and hang them with string. Cost: $2–$5. Difficulty: easy. Time: 15–25 minutes.
- Cardboard picture-frame portal — Cut a large frame from a box, paint it black, and layer paper bats or a moon behind the opening. Lean it against a wall for a photo spot. Cost: $0–$8. Difficulty: medium. Time: 45–75 minutes.


Make the display work in daylight and after dark
Paper decorations can look crisp in daylight and disappear at night if they’re too small or too pale. Think about contrast and viewing distance. A window facing the street benefits from bold silhouettes; a mantel can handle delicate folds and layered details. For a porch, use cardboard as a backing or frame, then bring the pieces inside if rain or heavy dew is expected.
A few practical pairings make planning easier:
- For a rental window: black cardstock silhouettes attached with small pieces of removable tape.
- For a narrow mantel: paper rosettes, cone trees, and one low cardboard house.
- For a kid-friendly craft session: paper chains, plate pumpkins, and simple ghosts.
- For a nighttime focal point: a cardboard village with battery lights behind the cutouts.
- For a small budget: recycled boxes, cereal cartons, and leftover wrapping paper.
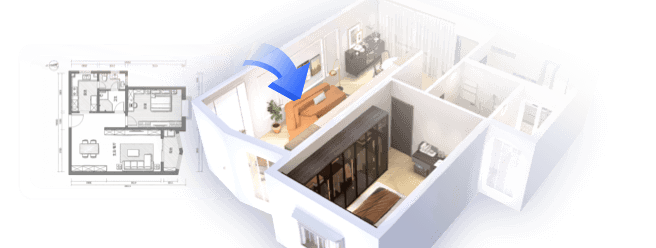
If you’re unsure about scale, sketch the display on scrap paper before cutting the final pieces. I’ve learned the hard way that a tiny bat looks charming on a desk but vanishes on a wide front window. You can also preview the room’s colors and proportions in Homestyler before committing to a large backdrop or a whole mantel arrangement. It’s a useful way to check whether a dark focal point will overwhelm a small room.
For a polished look, repeat shapes rather than adding more kinds of decorations. Three bats in different sizes feel intentional; bats, pumpkins, ghosts, and spiders all competing in one corner can read as clutter. Leave a little empty space around the main piece. That breathing room is free, and it makes handmade details easier to notice.


Keep the crafts safe, removable, and easy to store
Paper and cardboard are simple materials, but placement matters. Keep decorations away from stovetops, heaters, fireplaces, and real candles. Use battery-operated lights inside paper bags or cardboard houses, and check that cords don’t create a trip hazard. For children, pre-cut small or intricate shapes and let them handle the larger, easier cuts.
Adhesive is another common headache. Test tape on an inconspicuous area before decorating painted walls, and avoid strong glue on glass or finished furniture. For windows, attach lightweight pieces with removable tape at the corners. When the season ends, peel slowly and store flat between sheets of plain paper or in a shallow box. Label the storage box itself, not the decorations, so the pieces stay clean and reusable.
If you’re making outdoor props, treat cardboard as a temporary material. A covered porch is safer than an exposed lawn, and a damp box can sag overnight. You can reinforce a standing piece with a second cardboard layer or a folded support at the back. For a windy spot, keep the decoration low and secure it to a stable base rather than relying on tape alone.
What began as an Autodesk innovation has evolved into a design platform used by more than 20+ million registered users (platform data, 2026) around the globe. Homestyler combines powerful rendering, an intuitive editor, and a vast furniture library to help you turn inspiration into photorealistic designs — whether you're redesigning a single room or planning an entire home.
I’d start with one window or one small tabletop, then add a second area only if the first feels balanced. A few well-placed paper shapes often look better than a room covered from corner to corner. If you want to test a color scheme or see how a Halloween focal point fits your room before crafting, Homestyler can help you preview the arrangement. Pick one project, save the scraps, and let the rest of the cardboard box wait until next weekend.
Projete agora para LIVRE