
- Compact rectangular island: A simple worktop for a medium-sized kitchen. Keep it free of bulky features if the main need is extra chopping and landing space.
- Small movable island: A cart or freestanding unit on locking casters suits a tight kitchen where flexibility matters. It is not a substitute for a fixed island with utilities, and it should be stable during use.
- L-shaped island: The angled work surface can separate prep and serving zones or create a seating corner. It takes more floor area and can leave an awkward inside corner if storage is not planned carefully.
- T-shaped island: A crossbar can create a distinct dining or social zone beside a narrower work surface. Check that the junction does not interrupt the main route through the kitchen.
- Double-level island: A raised or lowered section can visually distinguish dining from preparation. The height change may reduce usable counter area and can make cleaning more involved, so choose it for a clear functional reason.
- Prep-focused island: A broad, uncluttered surface prioritizes chopping, mixing, and setting down groceries. It works well when the perimeter counters already handle cooking and cleanup.
- Island with a sink: This places washing and preparation together, but requires plumbing and careful coordination with the dishwasher and waste storage. It can also make the island feel busy when dishes accumulate.
- Island with a cooktop: Cooking becomes more social, but ventilation, electrical or gas supply, heat protection, and safe landing areas need early planning. Avoid placing a hot cooking surface where seated guests or children can reach it easily.
- Peninsula instead of an island: Attached to a cabinet run or wall, a peninsula can offer seating and worktop space with less circulation demand. It is often the better answer when a freestanding island would narrow the room.
A kitchen island can add prep space, storage, seating, or a place to gather;but it can also obstruct the room if its footprint is wrong. The best kitchen island models are not simply the most attractive ones; they fit the available floor area and support the way people cook and move. This guide compares nine useful configurations, explains the trade-offs, and offers a practical way to choose among them. If you are researching modelos de islas para cocinas, start with the room’s clearances and daily tasks rather than a photo you want to copy.

Modelos de islas para cocinas: empieza por el espacio
An island is a freestanding work surface with access around at least part of its perimeter. A peninsula connects to a wall or cabinet run, so it has fewer open sides. Both can provide useful counter space, but they solve different planning problems: an island needs circulation on its exposed sides, while a peninsula can preserve a walkway in a narrower room.
Before choosing a shape, mark the fixed elements: walls, doors, windows, columns, plumbing, and appliance locations. Then map the routes between the refrigerator, sink, cooktop, and the room’s entrances. A beautiful island that forces someone to squeeze behind an open dishwasher is not a successful layout.
I usually recommend testing the footprint with painter’s tape or cardboard before ordering cabinets. Walk around the outline while pretending to open the oven, dishwasher, and refrigerator. This quick test often reveals conflicts that a floor plan makes easy to overlook.
Modelos de islas para cocinas: nueve distribuciones útiles
The following options are organized by function and footprint, not by a single style trend. Some can be combined—for example, a rectangular island can also include a prep sink or seating overhang—but each has a distinct planning priority.


Modelos de islas para cocinas: elige una forma funcional
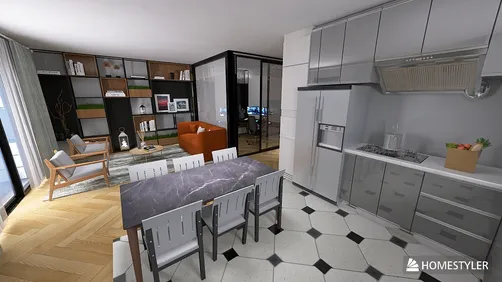
A rectangular island is the easiest shape to plan and usually makes the most efficient use of cabinetry. It can serve as a prep station, a landing zone, or a shared surface. Its weakness is that it can become a barrier if it is too long or placed across the natural route between the kitchen and dining area.
L- and T-shaped designs create separate zones, but their extra corners need a purpose. Ask whether the shape improves circulation, gives someone a comfortable place to sit, or separates cooking from serving. If it only adds an unusual outline, a simpler rectangle may provide more usable surface and easier storage.
A curved or rounded end can soften a tight passage and reduce sharp corners, but curved cabinetry may cost more and can sacrifice storage. A waterfall edge is a finish detail rather than a layout solution: it may protect the side panel and create a continuous look, but it does not add work area. Prioritize the plan before selecting decorative treatments.
Size, clearances, and seating: the measurements that matter
There is no universal island size that works in every kitchen. The room’s dimensions, appliance doors, and number of cooks determine the usable footprint. As a planning starting point, many designers aim for roughly 36–42 inches (about 91–107 cm) of clear passage around an island, with more space where two people need to pass or where appliances open. Treat these as practical guidelines, not a substitute for local code or a measured plan.
Aisle width should be checked at the narrowest point, including handles and open doors. A dishwasher door can occupy much of a walkway when lowered; a refrigerator door may need room to swing fully. If the island sits opposite a range, allow enough room to work safely without forcing someone to pass close behind a person cooking.
Seating needs its own clearance. A counter overhang gives knees room, while the space behind stools must allow people to pull out and move past. Do not count a stool tucked under the counter as proof that the aisle is adequate. Test the occupied arrangement, not just the empty floor plan.
For a small kitchen, a narrow island or peninsula may be more useful than a large block. If the only way to fit an island is to reduce the main passage to an uncomfortable squeeze, remove it from the plan. A clear route and functional perimeter counters are more valuable than an island-shaped object.
Storage and features: add only what earns its space
Cabinet doors, drawers, open shelves, and appliance access all compete for the island’s limited volume. Deep drawers are convenient for pots and pans; shallow drawers can keep utensils organized; open shelves make frequently used items accessible but collect dust and visual clutter. Put storage on the side where it can be reached without crossing the cooking zone.
A microwave drawer, wine cooler, or recycling pull-out can be useful, but each feature changes the cabinet plan and may affect electrical or ventilation requirements. A sink or cooktop adds utility connections and coordination costs. Decide on these features before cabinetry is ordered, not after the island has been installed.
I’ve seen homeowners choose an island sink because it looked polished in a reference image, then discover they preferred an uninterrupted prep surface. Think through the routine: where do groceries land, where is food chopped, where are dirty dishes placed, and where do people sit? The answers should determine the features.
Materials and lighting for a practical focal point
The island does not have to match every perimeter cabinet exactly. A contrasting cabinet color can define the center of the room, while a coordinated countertop keeps the overall palette connected. For durability, compare the manufacturer’s care instructions, heat tolerance, stain resistance, and repair options—not just sample-board appearance.
Countertop seams, sink cutouts, and overhangs should be planned with the fabricator and cabinet installer. Natural stone varies from slab to slab; engineered surfaces also have product-specific limits. Use a full-size sample or view the actual slab when color variation is important.
Lighting should illuminate the work surface without blocking sightlines. Pendant fixtures can mark the island as a focal point, but their number and spacing depend on the island length and ceiling height. Recessed or track lighting may be a better fit where the ceiling is low or the room is visually busy. Confirm fixture placement after the island dimensions are finalized.
Island or peninsula? Compare before committing


| Planning question | Freestanding island | Peninsula |
|---|---|---|
| Access | Needs circulation around exposed sides | Attached on one side, so fewer open routes are needed |
| Best fit | Rooms with enough width and clear paths | Narrower kitchens or layouts with a natural wall connection |
| Flexibility | Can define the center of an open-plan room | Can create a boundary between kitchen and adjacent space |
| Utilities | May require services routed through the floor or ceiling | Connections may be easier near existing cabinets or walls |
| Main risk | Can obstruct traffic if oversized | Can make a room feel enclosed if it projects too far |
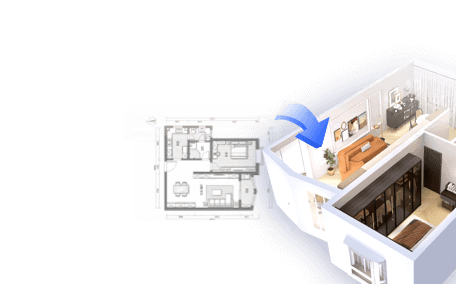
A peninsula is not a lesser version of an island. It can provide a breakfast bar, extra prep space, and a useful boundary without requiring a walkway on every side. I recommend comparing both footprints on the same measured plan before deciding. A simple 3D layout can help you see whether stools, cabinet doors, and circulation paths compete for the same space; you can test alternatives with Homestyler.
A simple selection process
Use this sequence to narrow down the models before discussing finishes or ordering cabinetry:
- Measure the room: Record wall lengths, openings, ceiling height, and fixed services. Include trim and appliance handles where they affect clearance.
- Mark the work zones: Identify the refrigerator, sink, cooktop, and the routes between them. Note where groceries and prepared food need to land.
- Set the circulation paths: Draw the minimum comfortable passages and appliance-door swings. If the island breaks a route, reduce it or test a peninsula.
- Choose the primary job: Decide whether the island is mainly for prep, storage, cleanup, cooking, or seating. One clear priority usually leads to a better plan than trying to fit everything.
- Add secondary features: Include a sink, cooktop, or seating only if the room can support the required clearances and services.
- Mock up the footprint: Tape the outline on the floor and test it with doors open and stools pulled out. Revise the shape before committing.
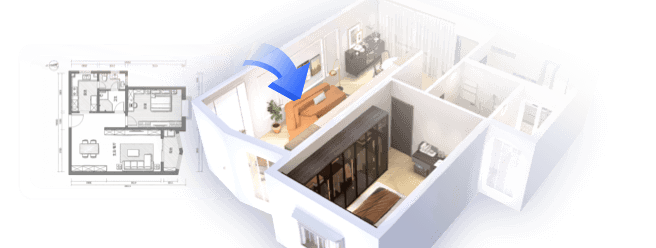
For a visual check, build a rough room model and compare a compact rectangle, an L-shaped option, and a peninsula. A 3D plan is especially helpful when the kitchen opens into a dining or living area, because it shows how the island affects sightlines as well as circulation. Homestyler can help you compare those arrangements before you settle on a final footprint.
Common planning mistakes to avoid
- Choosing by appearance alone: A dramatic island may not fit the room’s routes or daily tasks.
- Ignoring appliance doors: Measure the aisle with the dishwasher, oven, and refrigerator open where relevant.
- Overloading the island: Sink, cooktop, seating, storage, and prep space cannot all be maximized in every footprint.
- Forgetting the people using it: Consider how many cooks work at once, whether children sit nearby, and how guests move through the room.
- Treating a guideline as a code requirement: Clearance recommendations vary by layout and jurisdiction. Confirm applicable building, electrical, plumbing, and ventilation rules with qualified local professionals.
- Ordering before services are coordinated: Plumbing, wiring, ventilation, and structural needs should be resolved before cabinets and counters are fabricated.
Make the island fit the way you live
The strongest kitchen island models solve a specific problem without creating a new one. A compact rectangle can add prep space; an island with a sink can bring cleanup closer to food preparation; a peninsula can deliver seating when the room is too narrow for a freestanding unit. The right choice depends on measured clearances, appliance access, and the habits of the people who use the kitchen.
My advice is to settle the layout before choosing colors and countertop details. Compare at least two footprints, test the circulation in person, and confirm utility requirements with your contractor or designer. When the island supports the room instead of dominating it, it becomes a useful part of the kitchen rather than an obstacle in its center.
Originally incubated at Autodesk, Homestyler has grown into one of the most widely adopted home design platforms in the world, now trusted by over 20+ million registered users (platform data, 2026). Whether you're a homeowner exploring ideas or a professional designer delivering client-ready renders, Homestyler brings industry-leading 3D technology to your fingertips — no experience required.
To compare finishes and layouts in context, create a simple room plan in Homestyler and test the island footprint before making a purchase.
Projete agora para LIVRE